


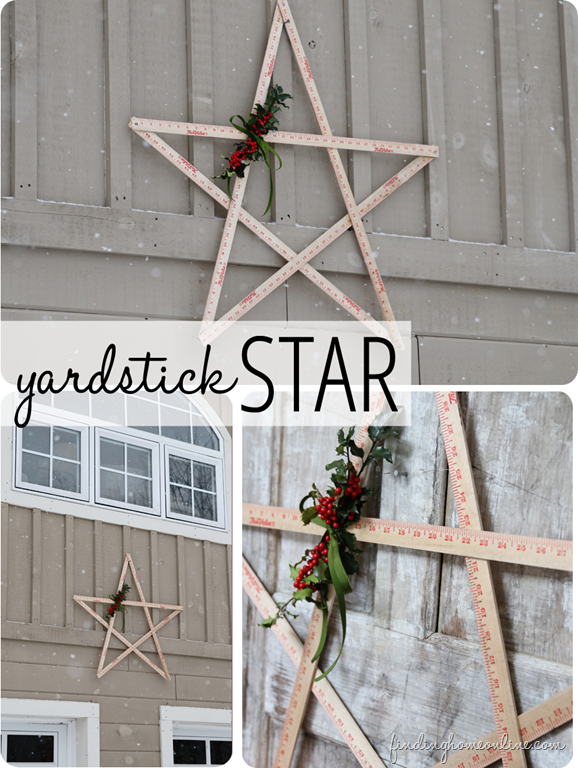
DIY Wall Art - Yardstick Star

I created this project for Christmas originally, but I think it is perfect for year round. Of course, you will have to excuse that all of the pictures are from Christmas time - but you get the idea!
A DIY star made from yardsticks - an easy and quick DIY wall art project.
How to:
- Start with 5 yardsticks. I picked mine up at a True Value store and just hit them with some of Miss Mustard Seed’s antiquing wax to make them look older. This would also work great with vintage yardsticks.
- Lay them out in a star pattern
- Use a drill to make a small hole at each joint.
- Attach each “point” with a small bolt and nut. Keep it loose until they are all attached. Then form your desired star shape and tighten the bolts to hold in place.
I wired on a cluster of holly and tied on a ribbon for Christmas - but have now taken it off for year round use.
Just remove the holly and ribbon and it is ready for year round decorating.
It is perfect on a gallery wall…
And of course, outside…
If you would like to see other some other projects I have made with yardsticks,
There is my yardstick arrow...
And my yardstick deer silhouette...
