Christmas Tree Decorating: How To Get the Look

Hello sweet blog friends.
Today, I thought I would share with you how I went about my Christmas tree decorating.
I shared our home tour the other day – and I have to tell you, one of the things that makes me giddy to my toes - is to finally have a tree in our family room.
Seriously.
It makes me so happy!
We have spent each night with the lights out and enjoying the tree.

I have always wanted a tree in our family room, but felt it was would never work near the fireplace – the only area it would fit.
And, I had never found a fake tree I really liked.
So, when Balsam Hill offered to send a tree, I was so pleased for the opportunity to give a try.
I went for a smaller tree, so that it would easily fit in the corner, and then placed it on an upside down galvanized bucket for some height.

I really wasn’t sure what to expect because my only experience with a fake tree was a cruddy one I bought at a yard sale and my white one that I have to fill with other stuff so you don’t see the giant holes.
This tree came in a big box.
We opened it – and I not lying – we set it up in less than ten minutes – fluffing included.
We just linked together three parts, plugged it in and fluffed it a bit.
It also came with a storage bag, which I thought was a nice extra touch.
And then I set out to decorate it.
Our real tree will be filled with all of our family ornaments and special treasures – but I still wanted to make this tree special.
I worked with ornaments I had, vintage ornaments I have been collecting and a whole bunch of DIY ornaments.
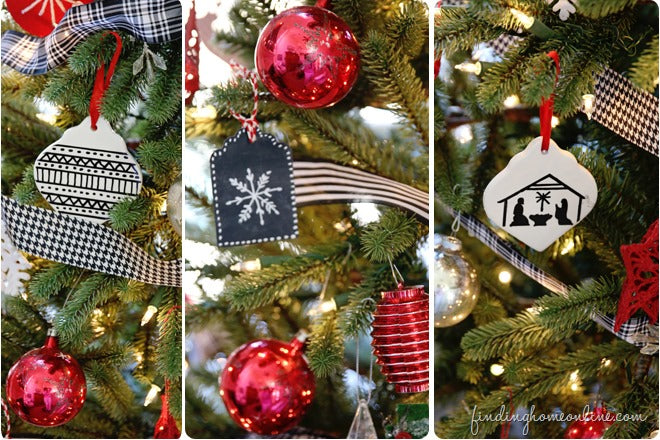

And now I thought I would share with you how you could create a similar look if you wanted.
1. Of course, it starts with the tree. This is the tree I selected. Ours is the 6.5 foot so it is only 46” around. However, if you visit here, you can search for whatever tree works best for your space. It really is a beautiful tree.
2. Black and white ribbon. Almost any will do, and as you can see, I mixed up different ones. Just using what I had.
6. Red Ornaments – but really, almost anything red will do!
7. Crochet glass balls - These are great option texture wise in place of the stars, and how I love the glass combo and the green color too.
8. A pretty beaded snowflake topper.
9. Stars – These are from Ikea and they are not sold online. I wish I had bought the white ones too! Number 7 is a great option if you don’t have an Ikea.
10. Follow this tutorial here.
11 and 12. Follow this tutorial.
And if would like to see another Balsam Hill tree, visit sweet Kim over at Sand and Sisal
Her tree is gorgeous!
We are both part of the 12 bloggers of Christmas. Links to the whole list are below.
Monday December 2nd: Vanessa (At The Picket Fence) Ashley (Cherished Bliss)
Tuesday December 3rd: Beth (Unskinny Boppy) Candace (Vintage News Junkie)
Wednesday December 4th: KariAnne (Thistlewood Farms) Kristin (My Uncommon Slice of Suburbia)
Thursday December 5th: Kim (Sand and Sisal) Laura (Finding Home)
Friday December 6th: Courtney (French Country Cottage) Jeanne (Jeanne Oliver)
Saturday December 7th: Jen (Jen Rizzo) Heather (At The Picket Fence)
Also, if you missed any of the stops on the Holiday Housewalk, start here...
Stop back on Sunday – we will all be sharing a treat!
Thanks so much for reading!
 Disclosure: This is not a sponsored post, but Balsam Hill did provide me the tree to review. Some of the links are affiliate links. All opinions are my own!

